For many proud lawn owners, a thick, spongy feel underfoot can set off alarm bells. It often raises questions like: “Is my lawn unhealthy?” or “Why does it feel like I’m walking on a mattress instead of grass?” The answer to this very common problem usually lies in a natural but sometimes troublesome condition known as thatch build-up.
In this article, we’ll cover everything you need to know about thatch: what it is, why it happens, and—most importantly—how you can safely dethatch your lawn. We’ll also look at the tools and timing that will give you the best results, as well as additional lawn care tips that can restore your lawn to its lush, healthy state.
What Is Thatch?
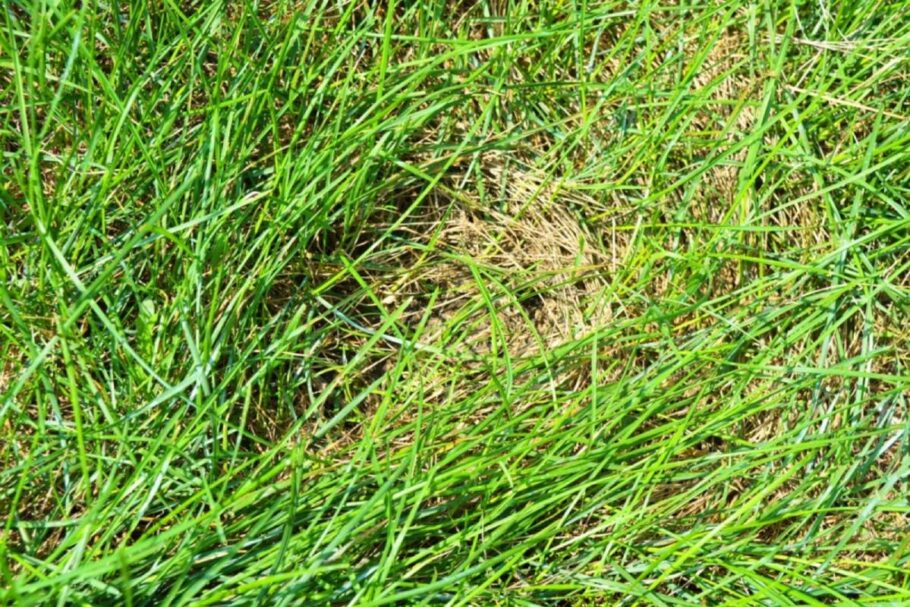
Thatch is a layer of dead and living organic matter—such as decomposing stems, shoots, roots, and leaves—that accumulates between the green grass blades and the soil. Unlike the top layer of grass that you can easily mow, thatch sits just below the surface.
A thin layer of thatch (around 0.5 cm) is actually beneficial. It helps protect your lawn from heavy foot traffic, keeps soil cooler during summer, and conserves moisture. However, when thatch builds up too much—sometimes reaching several centimetres thick—it can cause serious problems.
Why Thatch Build-Up Happens
Thatch accumulation is caused by your lawn producing more organic matter than the soil microbes can break down. Several factors can speed up this process, including:
- Turf variety – Some grasses, such as couch and kikuyu, naturally produce more thatch than others.
- Overwatering – Excessive watering encourages shallow root systems, which can contribute to organic matter build-up.
- Overfertilising – High nitrogen fertilisers encourage fast, lush growth, leading to more stems and shoots that eventually die off and form thatch.
- Compacted soils – Poor soil aeration prevents microbes from breaking down organic matter efficiently.
Over time, this build-up can become unsightly and unhealthy, leaving your lawn spongy, uneven, and prone to pests and disease.
Why Excessive Thatch Is a Problem
At first glance, a thick lawn might look healthy and green. But beneath the surface, excessive thatch creates a barrier that prevents vital elements like air, water, and nutrients from reaching the root zone. This can trigger several issues:
- Restricted Root Growth – Roots may grow into the thatch instead of the soil, making the lawn shallow-rooted and less drought-tolerant.
- Waterlogging – Water can pool in the thatch layer, suffocating roots and creating the perfect breeding ground for fungal diseases.
- Pest Problems – Thatch offers a cosy habitat for pests such as lawn beetles, grubs, and fungi.
- Poor Fertiliser Uptake – Nutrients can get trapped in the thatch instead of reaching the soil, meaning your fertiliser investment goes to waste.
- Unsightly Appearance – A lawn with excessive thatch may look patchy, spongy, or scalped after mowing.
In short, thatch is like a clogged filter for your lawn. If left unmanaged, it can eventually suffocate your turf.
How to Check for Thatch in Your Lawn
Not sure if thatch is your issue? Here’s a simple test:
- Dig out a small wedge of lawn (around 10 cm deep).
- Look at the cross-section. You’ll see the green blades, a spongy brown layer, and then the soil.
- Measure the brown spongy thatch layer. If it’s thicker than 1.5 cm, it’s time to dethatch.
How to Dethatch Your Lawn
There are different methods to remove thatch, and the right one depends on your lawn variety and how severe the problem is. Let’s explore the most effective approaches.
1. The Low Mow (Scalping) Method
For many Australian lawns, especially warm-season varieties such as couch and kikuyu, the easiest way to dethatch is through a low mow.
Here’s how to do it:
- Lower your mower blades gradually until you reach the lowest setting.
- Mow the entire lawn, ensuring you cut deep enough to reach the thatch layer. For tough varieties, you may need to mow multiple times in different directions.
- Collect and remove the clippings—this part can produce a lot of debris, so be prepared with a large bin or trailer.
- Water the lawn lightly afterwards to reduce stress.
⚠️ Important note: Not all turf varieties tolerate scalping. For example, Sir Walter DNA Certified buffalo grass grows via surface runners, so you should avoid cutting too deep. Always leave some leaf matter to regenerate.
2. Using a Verticutter or Power Rake
For severe thatch build-up, you may need specialised equipment:
- Verticutter – Uses vertical blades to slice into the thatch and pull it up.
- Power rake – Works similarly but with flexible tines designed to lift debris.
These machines are often available for hire from landscaping suppliers. While they are effective, they can be aggressive, so they’re best suited for hardy grass types.
3. Manual Raking
If you have a small lawn, a stiff garden rake can be used to physically pull up thatch. While labour-intensive, it’s a budget-friendly option and allows you to work carefully in sensitive areas.
When Is the Best Time to Dethatch?
Timing is everything when it comes to dethatching.
- Best season: Late spring to early summer is ideal, as warm-season grasses are in their most active growth phase. This gives your lawn plenty of time to recover before winter.
- Avoid winter: Grass growth slows significantly, so the lawn won’t bounce back after the stress of dethatching.
- Avoid extreme heat: Dethatching during a heatwave can shock your lawn and increase the risk of sunburned patches.
By choosing the right time, you give your lawn the best chance of regenerating quickly and evenly.
Aftercare: Helping Your Lawn Recover
Dethatching can leave your lawn looking bare and messy, but with proper aftercare, it will quickly bounce back stronger than before. Here are some recovery tips:
- Water Deeply and Consistently – Give your lawn a thorough soak immediately after dethatching, then water consistently to support regrowth.
- Fertilise – Apply a balanced spring fertiliser to replenish nutrients and encourage strong recovery.
- Topdress with Soil or Sand – Spread a thin layer of soil or sand to even out the surface and improve drainage.
- Overseed if Necessary – For patchy areas, consider overseeding with the same grass variety to speed up coverage.
- Avoid Heavy Traffic – Try not to walk on or use the lawn heavily until it has thickened again.
Preventing Thatch Build-Up in the Future
Once you’ve dethatched your lawn, you’ll want to prevent the problem from recurring. Here are some proactive steps:
- Mow regularly at the correct height for your grass type.
- Aerate annually to reduce soil compaction and encourage microbial activity.
- Fertilise wisely—don’t overdo nitrogen, and always follow product instructions.
- Water deeply but infrequently, encouraging roots to grow deeper into the soil rather than sitting in the thatch.
- Choose the right turf supplier. Starting with a high-quality lawn from experts like Direct Turf gives you an advantage, as their premium turf varieties are grown and supplied with healthy root systems that are less prone to excessive thatch.
Final Thoughts
A spongy lawn might feel soft underfoot, but it’s usually a warning sign of too much thatch. Left untreated, this layer can suffocate your lawn, waste water and fertiliser, and create the perfect environment for pests and diseases.
The good news is that dethatching is straightforward, especially if you tackle it at the right time of year and follow up with good aftercare. Whether you choose the low mow method, specialised equipment, or manual raking, your lawn can recover quickly and return greener and healthier than ever.
By managing thatch build-up properly and following preventative care, you’ll not only improve the health of your lawn but also enjoy a more resilient, vibrant yard year-round. And remember—when it comes to sourcing top-quality turf in Australia, Direct Turf is a trusted name that can set you up with the right grass variety from the start.